Saturday, December 18, 2010

Today's Walking Tour of Wilkes-Barre's Murals


This morning I had the pleasure of helping a group of local Boy Scouts earn their art badges. To start the day, I served as their tour guide and showed them all of the murals on South Main Street in Wilkes-Barre. The first mural we viewed was painted by John Pacovsky. Not only is John an artist, but he's the inventor of the Float Canvas (aka the Corner Canvas), which is produced by Fredrix Canvas.


These pictures do not do justice for John's mural work, but I was working on a tight deadline and wanted to keep things moving. It was freezing outside as well, so I snapped quick pics today.

John is an inspiration to me, and I'm glad to know him! To learn more about his work, click here.


Next, we viewed one of Leigh Pawling's murals.  I love the pretty poppies. Check out the beehive hidden in the top right-hand corner.


Leigh is a well-known mural artist, and I actually helped to create her Web site. It was a fun project because Leigh is so colorful and has a wonderful sense of humor. Leigh also paints beautiful silks, so be sure to visit her Web site here. 


Moving right along, we had the chance to check out Sean Brady's nifty wire work. Sean is a master working with wire. I can't imagine working on that scale. Sean's certainly a creative and talented artist.

When we returned to the Art Seen Gallery in Wilkes-Barre, I reviewed color theory with the scouts and they painted some fabulous creations using the three primary colors. Then my friend Gwen took over and helped them with portrait sketching and collage.

Finally, the scouts had a chance to view some of the artwork in the gallery. John Pacovsky's "Life Size Box People" paintings obviously pertain to animals as well. I love this cat painting. If I recall correctly, John mentioned that this is his daughter's cat. To learn more about John's Life Size Box People, click here.


Meow!


I'd like to thank the Boy Scout of America Troop 232 from Dallas, PA for being a great group of kids. They really were a nice group to work with, and congratulations on earning your art badges.

Friday, December 17, 2010

Speaking of Ornaments...

~image used with permission by DRG Publishing~

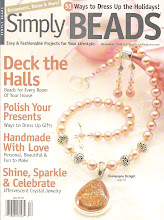
This birdhouse ornament is a nice way to bring some of the outdoors inside for the Christmas season. I created this ornament for an article I wrote titled Gift of Love, which appeared in the December 2008 issue of Simply Beads. I didn't provide step-by-step instructions for this ornament in the article, so I'm pleased to post them here.

When creating this ornament, I was going for a shabby-chic look. Once the birdhouse is painted, this project can easily be completed within less than an hour's time. So, let's get started.

Materials

* Small, wooden birdhouse ornament from the Dollar Tree
* Americana acrylic paint by DecoArt in the following colors: Snow (Titanium) White, Burnt Umber
* American Painter #10 flat shader (series 4300)
* Super Thick tacky glue from Aleene's
* Turquoise beads from FireMountainGems.com
* 20-gauge wire from ArtBeads.com
* A twig from outdoors

Tools
* Wire cutters
* Round-nose pliers
* Chain-nose pliers
* Flat-nose pliers
* Garden shears

Instructions

1) Paint the birdhouse ornament with two coats of Snow White. Let dry between each layer of paint.
2) Apply some Burnt Umber using a dry brush technique, and gently wipe away excess paint so that the white paint shows through. Let dry completely.
3) Wrap some wire around a twig and create some fancy shapes with your round-nose pliers. I formed my wire to look like little flowers, and I added some turquoise beads.
4) Glue the turquoise beads and the twig onto the birdhouse. Let dry completely.

Now your ornament is ready to hang on the Christmas tree. Consider painting your birdhouse either red or green for traditional Christmas colors.

Wednesday, December 15, 2010

Original Artwork Featured in Celebrate 365

 ~photo used with permission of publisher~

I'm happy to announce that one of my original paintings has been chosen for the winter 2010 edition of Celebrate 365.


I had just finished painting this piece titled Prim Snowman with Garland when I saw a call for artwork for this fabulous publication. This original piece of artwork is now available for sale for $149. It's painted on a piece of recycled wood using acrylic paints by DecoArt. The sides of the wood are painted, so you don't need a frame. It comes ready to hang.

This painting is based on my watercolor collection of prim snowmen sporting tall top hats. I was really in the Christmas spirit while painting and decided to give this dapper guy some stripes on his hat and a bit of holly.

As with all the sales of my original artwork, the artist retains the rights to the image, i.e., the copyright does not transfer to the buyer of the original artwork.

~photo used with permission of publisher~

It's a bit hard to see the artwork on this page, but my prim snowman is located in the top, right-hand corner.
Did I mention that my friend Sandra Caldwell of Babycakes Designs is also featured on the same page? Way to go, Sandra!

Be sure to check out this premier magazine for the ornament collector by clicking here.  It's a terrific source for all who love collectibles.

Tuesday, December 7, 2010

Julius-In-The-Box


Julius has a thing for boxes, and he likes towels. When he started frequenting this box, I decided to make it a bit more cozy, so I lined it with towels. He loves it!


Look at that face!


Julius also likes this box. It's a bit smaller, but it's a perfect fit.

Saturday, December 4, 2010

Hey, Buddy!


Calling All Vintage Toy Enthusiasts! John just listed this fabulous Buddy L merry-go-round truck on eBay. This vintage find is still in the box and is in mint condition. To learn more, click here.


There's nothing like scoring some good finds at an estate sale. Does this bring back memories for anyone? This little truck was a bit before my time.


John also listed this vintage Skipper doll on eBay. Click here for details.


This little beauty has never been removed from this box. The cellophane is still wrapped around her head. What a find, and here's to that special someone who receives it just in time for Christmas.

Friday, December 3, 2010

Another Beautiful Christmas Tree


I had the opportunity to visit a local organization today, and I was delighted to see the Christmas tree in the lobby. The children did a fantastic job with the decorations.


A closeup photo shows the candy garland that makes its way around the tree.


Lollipops, snowmen, stars, and snowflakes make for great ornaments on this beautiful Christmas tree.

Thursday, December 2, 2010

O Christmas Tree


Wow! Check out these brightly-colored ornaments. Tonight's visit to Cracker Barrel brought not only good food but a ton of inspiration for the Christmas season. Hats off to their design team.


The plush ornaments on this Christmas tree are so adorable. Love that lime green color. Check out the fringe on the jolly ornament. It's so '70s.


 Here's to the classic red and white designs.


Bring on the shine!


Now bring on some glitter.


 And more glitter.


Ice, ice, baby!

Tuesday, November 30, 2010

Let It Snow in Paper Snowflakes!


I finally finished the bulletin board I set out to decorate a few weeks ago. The snowflakes put me in a snowy mood, so I thought I'd put a snowman in there too.


This is what Mr. Snowman looked like before I dressed him up. I used poster board for the snowman, and I used construction paper for the eyes, mouth, nose, and buttons.


Of course, Aleene's® Original Tacky Glue® was my glue of choice for this project.


The arms and scarf were also made using construction paper. Aleene's® Original Tacky Glue® does a great job keeping everything together.


To make the nest, I used a piece of light-tan construction paper to serve as the base. Then I used shards of brown construction paper to represent the twigs. The cardinal was glued to the back of the nest. Not bad for the first try!

Let it snow in paper snowflakes, of course!

Saturday, November 27, 2010

Holidayz Giveaway 2010


Be sure to stop by the Merry Whatever blog to see what we're giving away for Christmas. We're featuring many giveaways from the Merry Whatever artists. It's our way of saying thanks for all your support this year and years gone by. Click here for more details.

Friday, November 26, 2010

Home Again on Black Friday


Home Again was buzzing with customers today during the Black Friday shopping event. If you're looking for unique gifts, a visit to Home Again in Luzerne, PA is a must. You'll also get to see some goodies from yours truly since I dropped off a bunch of prim ornaments and earrings from my Recycle with Style™ jewelry line.


Mary, the store owner, is a master when it comes to staging a store. When you walk into this quaint boutique, you don't want to leave. In fact, a customer from New York said the very same thing this afternoon.


Mary decorated one of the front windows with a woodsy theme, which gave it that classic cabin feel.


This is just one of many Christmas trees in Mary's store. I was captivated by the ornaments made out of dried oranges, and I love the way Mary wrapped the tree in raffia.  The tree skirt is by Capitol Earth Rugs. While in Mary's store, I bought a rug by Capitol Earth Rugs with the Penn State logo for a dear neighbor who is always dropping by with food. My neighbor is a big Penn State fan, so she's going to love the rug.


Here's a closeup of the tree all decked out in dried-orange ornaments, raffia, and tin stars. Just lovely.


The individual sections of this dried orange remind me of stained glass. I love how the lights on the Christmas tree cast a glow behind the dried-out pulp.


This white Christmas tree serves as a background for the display in the other storefront window.


~ A lovely, oak mantel decorated for Christmas ~


~ A closeup of the snowman on the mantel ~


I've never seen a lamp like this before with a Southwestern theme. For $200, this is certainly a good buy.


The bottom of this lamp also lights up. It's not as bright as the top, but it casts a faint glow. 


Look at the hand-painted details.


~ The base of the lamp ~


I'm not a fan of the color red, but this bedding by Victorian Heart Company, Inc. is something to see.


Mary certainly knows how to create a fabulous place setting. Look at how she used a wreath as a charger for each dinner plate. Amazing!

Wednesday, November 24, 2010

Design Featured in the Simply Beads Newsletter

I opened my Simply Beads newsletter this morning and was delighted to see my Autumn Takes Flight earrings project featured as the free project in the Volume 4, Number 16 (November 24, 2010) issue. This project originally appeared in the book titled Four Seasons of Beading by Barb Switzer.

Be sure to sign up for the Simply Beads newsletter for design inspiration and some fabulous projects.

To print a copy of this project, visit http://simplybeadskitclub.com/, and click on "Simply Beads newsletter," and then click on "free project."


Autumn Takes Flight

Click here for larger image.Design by Liz Revit
Get creative using resin charms to create these fabulous, lightweight earrings, adding whimsy to your autumn wardrobe. Swarovski® crystals add just a touch of sparkle to these fun-to-wear earrings.

Skill level

Intermediate

Materials

  • 2 (3/4 x 3/4-inch) gold resin square charms
  • 4 pewter spacers
  • 2 (8mm) green pearls
  • 4mm CRYSTALLIZED™ - Swarovski Elements bicone crystals:
    2 light Colorado topaz, 2 topaz, 2 erinite
  • 6 (1 1/2-inch) 24-gauge sterling silver head pins
  • 2 (7mm) silver-plated jump rings
  • 2 sterling silver ear wires
  • 2 (3-inch) lengths 20-gauge dead-soft sterling silver wire
  • Round-nose pliers
  • 2 pairs of chain-nose pliers
  • Wire cutters

Finished Size

2 1/4 inches long

Click here for larger image.Instructions

  1. Using both pairs of chain-nose pliers, open a jump ring and slide it onto a resin charm. Close ring.
  2. Form a wrapped loop at one end of a 3-inch piece of wire, attaching loop to onto jump ring attached to charm before wrapping. String a pewter spacer, pearl and a pewter spacer. Form a wrapped loop. Trim excess wire.
  3. Slide a bicone crystal onto a head pin. Form a wrapped loop. Trim excess wire. Repeat two more times for a total of three beaded dangles.
  4. Open loop on ear wire. Slide on all three beaded dangles and wrapped loop above pearl. Close loop.
  5. Repeat steps 1-4 for second earring.
Sources: Resin charms from Plaid Enterprises Inc.; pearls from Blue Moon Beads; pewter spacers from Talisman Associates Inc.; crystals, head pins and wire from Fusion Beads; ear wires and jump rings from Fire Mountain Gems and Beads.
Copyright © 2009 Four Seasons of Beading, Annie's Attic. All rights reserved.