Tuesday, November 30, 2010

Let It Snow in Paper Snowflakes!


I finally finished the bulletin board I set out to decorate a few weeks ago. The snowflakes put me in a snowy mood, so I thought I'd put a snowman in there too.


This is what Mr. Snowman looked like before I dressed him up. I used poster board for the snowman, and I used construction paper for the eyes, mouth, nose, and buttons.


Of course, Aleene's® Original Tacky Glue® was my glue of choice for this project.


The arms and scarf were also made using construction paper. Aleene's® Original Tacky Glue® does a great job keeping everything together.


To make the nest, I used a piece of light-tan construction paper to serve as the base. Then I used shards of brown construction paper to represent the twigs. The cardinal was glued to the back of the nest. Not bad for the first try!

Let it snow in paper snowflakes, of course!

Saturday, November 27, 2010

Holidayz Giveaway 2010


Be sure to stop by the Merry Whatever blog to see what we're giving away for Christmas. We're featuring many giveaways from the Merry Whatever artists. It's our way of saying thanks for all your support this year and years gone by. Click here for more details.

Friday, November 26, 2010

Home Again on Black Friday


Home Again was buzzing with customers today during the Black Friday shopping event. If you're looking for unique gifts, a visit to Home Again in Luzerne, PA is a must. You'll also get to see some goodies from yours truly since I dropped off a bunch of prim ornaments and earrings from my Recycle with Style™ jewelry line.


Mary, the store owner, is a master when it comes to staging a store. When you walk into this quaint boutique, you don't want to leave. In fact, a customer from New York said the very same thing this afternoon.


Mary decorated one of the front windows with a woodsy theme, which gave it that classic cabin feel.


This is just one of many Christmas trees in Mary's store. I was captivated by the ornaments made out of dried oranges, and I love the way Mary wrapped the tree in raffia.  The tree skirt is by Capitol Earth Rugs. While in Mary's store, I bought a rug by Capitol Earth Rugs with the Penn State logo for a dear neighbor who is always dropping by with food. My neighbor is a big Penn State fan, so she's going to love the rug.


Here's a closeup of the tree all decked out in dried-orange ornaments, raffia, and tin stars. Just lovely.


The individual sections of this dried orange remind me of stained glass. I love how the lights on the Christmas tree cast a glow behind the dried-out pulp.


This white Christmas tree serves as a background for the display in the other storefront window.


~ A lovely, oak mantel decorated for Christmas ~


~ A closeup of the snowman on the mantel ~


I've never seen a lamp like this before with a Southwestern theme. For $200, this is certainly a good buy.


The bottom of this lamp also lights up. It's not as bright as the top, but it casts a faint glow. 


Look at the hand-painted details.


~ The base of the lamp ~


I'm not a fan of the color red, but this bedding by Victorian Heart Company, Inc. is something to see.


Mary certainly knows how to create a fabulous place setting. Look at how she used a wreath as a charger for each dinner plate. Amazing!

Wednesday, November 24, 2010

Design Featured in the Simply Beads Newsletter

I opened my Simply Beads newsletter this morning and was delighted to see my Autumn Takes Flight earrings project featured as the free project in the Volume 4, Number 16 (November 24, 2010) issue. This project originally appeared in the book titled Four Seasons of Beading by Barb Switzer.

Be sure to sign up for the Simply Beads newsletter for design inspiration and some fabulous projects.

To print a copy of this project, visit http://simplybeadskitclub.com/, and click on "Simply Beads newsletter," and then click on "free project."


Autumn Takes Flight

Click here for larger image.Design by Liz Revit
Get creative using resin charms to create these fabulous, lightweight earrings, adding whimsy to your autumn wardrobe. Swarovski® crystals add just a touch of sparkle to these fun-to-wear earrings.

Skill level

Intermediate

Materials

  • 2 (3/4 x 3/4-inch) gold resin square charms
  • 4 pewter spacers
  • 2 (8mm) green pearls
  • 4mm CRYSTALLIZED™ - Swarovski Elements bicone crystals:
    2 light Colorado topaz, 2 topaz, 2 erinite
  • 6 (1 1/2-inch) 24-gauge sterling silver head pins
  • 2 (7mm) silver-plated jump rings
  • 2 sterling silver ear wires
  • 2 (3-inch) lengths 20-gauge dead-soft sterling silver wire
  • Round-nose pliers
  • 2 pairs of chain-nose pliers
  • Wire cutters

Finished Size

2 1/4 inches long

Click here for larger image.Instructions

  1. Using both pairs of chain-nose pliers, open a jump ring and slide it onto a resin charm. Close ring.
  2. Form a wrapped loop at one end of a 3-inch piece of wire, attaching loop to onto jump ring attached to charm before wrapping. String a pewter spacer, pearl and a pewter spacer. Form a wrapped loop. Trim excess wire.
  3. Slide a bicone crystal onto a head pin. Form a wrapped loop. Trim excess wire. Repeat two more times for a total of three beaded dangles.
  4. Open loop on ear wire. Slide on all three beaded dangles and wrapped loop above pearl. Close loop.
  5. Repeat steps 1-4 for second earring.
Sources: Resin charms from Plaid Enterprises Inc.; pearls from Blue Moon Beads; pewter spacers from Talisman Associates Inc.; crystals, head pins and wire from Fusion Beads; ear wires and jump rings from Fire Mountain Gems and Beads.
Copyright © 2009 Four Seasons of Beading, Annie's Attic. All rights reserved.

Monday, November 22, 2010

Anticipation

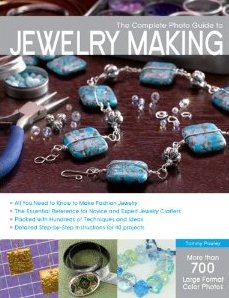
I'm honored to have some of my jewelry designs featured in the gallery section of  Tammy Powley's soon-to-be-released book titled The Complete Photo Guide to Jewelry Making.

As many of you know, Tammy Powley is about.com's jewelry making guide. It's been a pleasure working with her on my design submissions and getting to know her, especially during the summer when she needed the designers to submit more jewelry designs under extremely tight deadlines and specific photo guidelines. This time crunch actually forced me to figure out all of the fancy settings on my digital camera.

I'll keep you posted on the book's release date. In the meantime, you can order an advanced copy at Amazon.com.

Sunday, November 21, 2010

Christmas Inspiration


Although I haven't seen any snow yet, it definitely looks like Christmas. The stores are stocked with merchandise, and shoppers are out and about in full force. I love the way the visual merchandisers decorate their Christmas trees.


I snapped these two photos while shopping at Kohl's this afternoon. There are so many talented designers out there, and I encourage you to visit my friend Mary's blog at Home Again. Her store is all decked out for Christmas, and I can't wait to get over there for a visit.

What's on your decorating agenda for the Christmas season?

Tuesday, November 16, 2010

Snowflake Crafts


I'm currently working on a Christmas project that involves snowflakes, and I've been playing around with different ways to create paper snowflakes. Six of the snowflakes on the left-hand side of this photo show how I adhered tulle fabric to the back of each snowflake. I'm not too crazy about the color choice of the tulle, so I decided to continue making the snowflakes without the tulle.

After designing the snowflakes, I sprayed each one with Aleene's Spritz-On Reposition-It Tacky Glue. Then I sprinkled on some silver glitter.


I love this product! It's so easy to use. Just a quick spritz, and a dash of glitter, and you're done. Aleene's Spritz-On Reposition-It Tacky Glue is a wonderful alternative to using regular glue and applying it the old-fashioned way, which is the time-consuming way.

Saturday, November 6, 2010

Not Your Ordinary Charm


I was asked to create a charm for a customer who had a special request. Two of her cats recently passed away, and she wanted to keep a little part of each of them nearby, so I gladly accepted the job. Fellow cat owners can relate.

She gave me a tiny, glass jug that contained some of the cats' ashes, and she asked me to create a charm for her bracelet. It took five feet of 24-gauge sterling silver wire and three feet of 26-gauge sterling silver wire to complete the job and lots of time to wrap the piece.


May she wear the charm in good health knowing that her little loved ones are always close by.